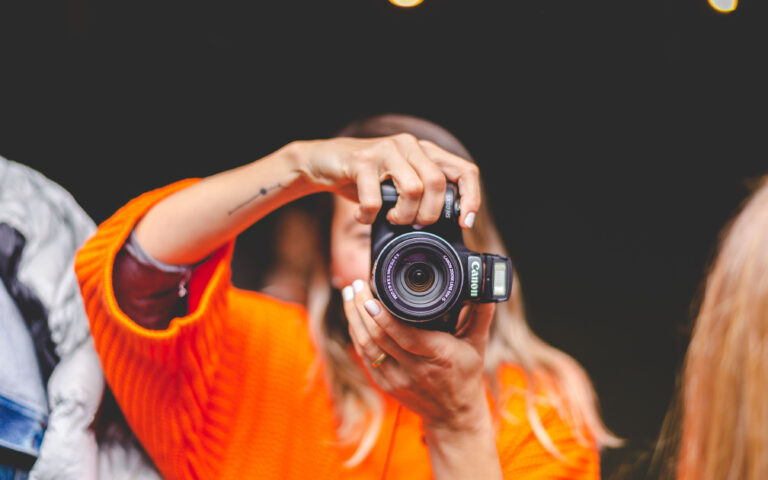
Lensrentals.com posted today their assessment of the 5D Mark III light leak fix, based on a new set of bodies that have been shipped by Canon. Naturally, they opened it up to see the fix, and below is what they found. While not exactly elegant, the simple electrical tape apparently does the job blocking stray light from the LCD display from hitting the metering system. Many folks are in an uproar about this simple solution, but quite frankly, those folks need to just chill. I, for one, think the issue is completely over blown. Who goes around shooting with their lens cap on and their LCD lit up anyway? I can see how this would potentially be an issue for someone doing long exposure night photography with auto-metering, but I can’t say that I’ve ever auto-metered a night shot. I see the point people are making about this being a $3500 camera, and issues like this being unacceptable. And while I agree to some point, I’m still very much enjoying my 5D and don’t plan on sending it back.
Source: Lensrentals.com
As you may or may not know, I sell my photography though FineArtAmerica.com, a trusted source for high quality art prints (that some of you already have on your walls, thank you!).
This month, they’re running a contest to select 5 images to feature in an upcoming TV commercial. There are two rounds to this contest – the first round is just a matter of getting at least 250 votes. The 2nd round is juried. The first round is where I can use your help!
If all of you could just visit each of the links below, and click the “Vote for this image” button, I would have enough votes to progress to the next round. All you have to do is log into the site with Facebook. They don’t save your information or require you to create an account, they just want to make sure you’re not a fake voter. So who wants to help me out?
Here are my three submissions:
Thanks in advance!!
From Canon USA: Canon USA will be launching new rebates starting on April 29, 2012. They will run through until June 2, 2012. This rebate program is a “double up” program. Your rebate will double if you purchase a 5D Mark II, 5D Mark III, 7D or 60D. For example, if you buy a 5D Mark III and a 14 f/2.8L II, the actual rebate would be $320.00.
The prices shown are current prices, rebate prices will be shown April 29th.
EF-S Zooms (Rebate Amount) Adorama Price | Amazon Price
- EF-S 15-85mm f/3.5-5.6 IS USM ($65.00) $799.00 | $689.95
- EF-S 17-55mm f/2.8 IS USM ($80.00) $1179.00 | $1149.00
- EF-S 10-22mm f/3.5-4.5 USM ($60.00) $859.00 | $835.00
- EF-S 60mm f/2.8 Macro USM ($40.00) $469.00 | $459.57
EF Prime (Rebate Amount) Adorama | Amazon
- EF 14mm f/2.8L II USM ($160.00) $2359.00 | $2199.00
- EF 20mm f/2.8 USM ($40.00) $539.00 | $539.00
- EF 24mm f/1.4L II USM ($120.00) $1749.00 | $1699.00
- EF 28mm f/1.8 USM ($40.00) $509.00 | $509.00
- EF 35mm f/1.4L USM ($100.00) $1479.00 | $1479.00
- EF 50mm f/1.2L ($120.00) $1619.00 | $1599.00
- EF 50mm f/1.4 USM ($30.00)$399.00 | $385.00
- EF 85mm f/1.2L II USM ($150.00) $2199.00 | $2154.80
- EF 85mm f/1.8 USM ($30.00) $419.00 | $419.00
- EF 100mm f/2 USM ($35.00) $499.00 | $499.00
- EF 135mm f/2.0L USM ($75.00) $1089.00 | $1089.00
- EF 300mm f/4.0L IS USM ($90.00) $1449.00 | $1449.00
EF Zooms (Rebate Amount) Adorama | Amazon
- EF 16-35mm f/2.8L II USM ($110.00) $1699.00 | $1609.00
- EF 17-40mm f/4L USM ($60.00) $839.00 | $828.00
- EF 8-15mm f/4L Fisheye USM ($100.00) $1499.00 | $1449.00
- EF 100-400mm f/4.5-5.6L IS USM ($110.00) $1699.00 | $1656.00
- EF 70-200mm f/2.8L IS USM II ($200.00) $2499.00 | $2489.99
- EF 70-200mm f/2.8L USM ($100.00) $1449.00 | $1348.99
- EF 70-200mm f/4L IS USM ($100.00) $1349.00 | $1349.00
- EF 70-300mm f/4-5.6L IS USM ($100.00) $1599.00 | $1499.00
- EF 70-300mm f/4.5-5.6 DO IS USM ($90.00) $1399.00 | $1326.29
EF Macro (Rebate Amount) Adorama | Amazon
- EF 50mm f/2.5 Compact-Macro ($20.00) $299.00 | $299.00
- MP-E 65mm f/2.8 1-5x Macro Photo ($70.00) $1049.00 | $1049.00
- EF 100mm f/2.8 Macro USM ($40.00) $599.00 | $589.00
- EF 100mm f/2.8L Macro IS USM ($70.00) $1049.00 | $1049.00
- EF 180mm f/3.5L Macro USM ($110.00) $1579.00 | $1548.89
EF Tilt Shift (Rebate Amount) Adorama | Amazon
- TS-E 17mm f/4L ($170.00) $2499.00 | $2374.00
- TS-E 24mm f/3.5L II ($150.00) $2199.00 | $2196.00
- TS-E 45mm f/2.8 ($100.00) $1399.00 | $1389.00
- TS-E 90mm f/2.8 ($100.00) $1399.00 | $1369.00
Teleconverters (Rebate Amount) Adorama | Amazon
Speedlites (Rebate Amount) Adorama | Amazon
- Speedlite 270EX II ($10.00)$169.00 | $159.00
- Speedlite 320EX ($25.00) $249.00 | $224.00
- Speedlite 430EX II ($20.00) $299.00 | $279.00
- Speedlite 580EX II ($30.00) $499.00 | $469.00
- Speedlite 600EX-RT ($30.00) $629.00 | $604.97
- Macro Ring Lite MR-14EX ($30.00) $549.00 | $519.00
- Macro Twin Lite MT-24EX ($50.00) $829.00 | $789.00
Spring has sprung all around us, a great time to break out the camera and take some pictures. In my case, it gives me a chance to prove my new Canon 5D Mark III was worth the money. I purchased the kit with the EF 24-105mm f/4 L IS USM lens to replace my trusty old 28-135mm lens. So far, I have to say I’m very pleased. There have been some complaints from certain users about the new AF system, but I believe most of those are unwarranted, and can be chalked up to users not reading the manual. This new AF system is amazingly fast and accurate, in many lighting conditions. I’m still testing other aspects of the camera, but I can safely say mine is not going back to the store. Here are a few images from around the garden.
Instagram for Android – A User Review
Big news hit the Interwebs on April 3rd of this year, Instagram was finally made available for Android devices! As Droid users rejoiced, iPhone fanboys (and girls) were found convulsing in fits of anger. Eh… iPhone, Android, I don’t really care. I just want cool apps available for whatever mobile device I happen to be using today. In my case, it’s an HTC Incredible 2, so I was intrigued what this Instagram hype is all about.
- test
- test
Downloading Instagram is a simple matter, like any other app open your phone’s Google Play Store, search, and install. After the customary sign-up and profile creation, you’re given the option to connect with friends via Twitter or Facebook. Then you’re brought to the Home screen, which shows your friends latest photos. The home screen is a basic photo viewer with options to “Like” or comment on photos of the people you follow. I like the simple nature of this screen, it’s all about showing photos one after another without too much extra fluff.
Other screens are accessed by touching the buttons along the bottom. The next one over from the home screen is the Popular screen, accessed by touching the star button. The popular screen shows, not surprisingly, seemingly popular images from Instagram at the time, based on Likes. While all of the images on the screen have many likes, it seems more random than necessarily best of the best. Hitting the refresh button on the top right corner (usually) gets a new set of images.
Next up is the all important Camera screen, which uses your phone’s forward or backward facing cameras and includes the flash option (if equipped). Pretty basic stuff here, just point and shoot. Alternatively, use this screen to choose an image you’ve already taken using another camera or gallery app. Once you’ve taken or selected a picture, you’re immediately brought to the edit / filter screen. Up to this point, I’ve been fairly satisfied, but this is where it kind of goes down hill for me. As a photographer, I feel that most of the filters are tired, boring, and just make images look like crap by adding noise and too much contrast. A few are on the tamer side, while most give your images a retro look. It’s ok, but at this point is starting to get over done. As far as image editing goes, not a whole lot to get excited about here. There’s a brightness/contrast enhancement button (top, middle) that basically over saturates and adds too much contrast, which in most cases (though not all) will just ruin the image. For really low contrast photos it may add some punch, but be careful with this one. I would like to see a slider that allows for gradual changes. Finally, there’s the borders. Borders are great accents to these square images, but why lock them down to a particular filter?? It would be great if they decoupled the filters from the borders, so that they can be selected individually. Now you might be saying “who cares about filters, I edit using another app anyway”. That’s fine and all, but what a pain to use separate apps for accomplishing one task?
Moving along… once you finish your amazing image filtering magic, on the Upload screen you can add a caption and hashtags as well as geotag your photo before uploading it to the Instagram cloud. You can also choose to post the image to Twitter, Facebook, Foursquare, and Tumblr (what, no Flickr?? no Google+??). This is pretty basic, but you don’t need any more. What I would like is the ability to change this information later. No can do… if you want to add anything (like additional hashtags), you can comment on your post. However, if you want to change or delete a caption, you have to delete the image and all associated likes and comments. Pretty weak.
Two other screens to mention really quick… There’s a News screen that shows any new comments, likes, or follows. Also on the news screen is a Following tab that shows news for the people you’re following. Lastly, there’s your Profile screen which shows your photos, followers, and those you’re following. The followers tab quickly allows you to follow back any of your followers.
Final thoughts… It’s hard to call this a gimmick app, considering its following of 30 million users and recent $1B sale to Facebook. But at the same time, I find it somewhat lacking, with other image viewing and shooting options available (ie Flickr). I also haven’t decided yet how it will help me in marketing myself as a photographer. Also, I’m seeing a significant amount of hashtag spam – people hash tagging images with the most popular words and phrases just to get as much exposure as possible (the other day I saw a photo of an ice cream cone tagged with many words, such as “sunset”, “dog”, and “clouds”). For me, the jury is still out. I’ll play with it some more, hopefully it’ll motivate me to observe my surroundings more for picture making opportunities when all I have is my phone cam. Perhaps I’ll also use it as another venue for showcasing photography taken with my “real” camera. In the long run however, I don’t see this app attached to my hip.
For some time now, I’ve been looking for a better way to capture incredible lightning photos other than pushing the shutter button over and over hoping to catch a bolt. The image on the left was a 15-second exposure that luckily captured two lightning bolts in the same frame. The third bolt was added from a second frame a few minutes later.
Some commercial solutions are available, if you’re willing to part with several hundred dollars, which I was not for an experimental endeavor. So I started researching home brew solutions that would allow me to tinker while also saving a bunch of money. Enter: Arduino – a powerful open source prototyping platform utilizing ATmega programmable microcontrollers.
At this point I would like to thank Maurice Ribble for his incredible work on the original iteration of this shutter trigger, which over the last few years he has developed into a full blown automatic triggering solution using any number of inputs including light, laser, sound, or motion, now known as Camera Axe.
That all said, I didn’t need high speed flash/camera triggers for photographing things blowing up (although it sounds like a lot of fun), or the tons of features and options of the Camera Axe. However, I did want a solution versatile enough to modify or add on to later, if I wanted. So I bought an Arduino UNO board with an ATmega328, dusted off my old breadboard, and started experimenting with a few components. In the end, I ended up with a circuit based on Maurice’s original design, but incorporating some of the tweaks from his newer circuits, and an optimized version of code. Details below show how you can make your own. Note that mine is based on inputs for my Canon 40D.
Circuits
There are three parts to the circuitry for this project. First and foremost, the microcontroller mentioned above, which runs the code and powers the inputs and outputs. Second, we need a sensor for detecting the lightning flashes. Finally, we need the shutter trigger mechanism.
The circuits on the left show the input and output interfaces as they connect to the Arduino. For added flexibility, instead of hard wiring everything, I decided to use 3.5mm stereo jacks for the sensor input and camera output. This way, I can later connect different sensors for high speed photography without rebuilding the circuit board.
The input circuit provides 5V power to the sensor port, which in this case goes to a phototransistor. The phototransistor detects light at time intervals determined by the programming and clocking of the processor. When the light level changes from one interval to the next, there is a change in the voltage level which is detected on the analog port of the arduino. Programming says “if the change is more than X threshold, trigger the camera”.
A signal is then sent to one of the Arduino’s digital ports, changing that port’s voltage from a low (off) state to a high (on) state. The transistors on the output circuit act as solid state switches, which just mimic the mechanical switch of a tethered camera remote (cable release). At this point, the digital output port is put back into low (off) state, and the light detecting loop continues.
The circuit shown here was done using Eagle, you can download my files here.
Parts List
I bought most of the parts I needed from Mouser Electronics, they have everything you might need and more, just be sure to buy a decent amount of stuff, otherwise it doesn’t really work out well on shipping. Radio Shack might have some common components if you’re stuck needing something at the last minute, but I wouldn’t count on finding the exact part. Outside of the list below, you’ll need some copper clad prototyping board, a power switch, and a box to stuff it all in (the one I bought was a bit cramped).
| Part ID | Part# / Description |
| D1-D4 | SD101C-TR Schottky Diodes (1N4148 are ok also, not quiet as fast) |
| R1-R2 | 150 ohm 1/4 W Resistors |
| R3 | 30 ohm 1W Resistor |
| R4-R5 | 10 kohm 1/4W Resistors |
| R6 | 1 kohm 1/4W Resistor |
| T1-T2 | 2N2222 NPN Transistors |
| T3 | 2N2907 PNP Transistor |
| A0/D0 | Pin Headers |
| n/a | 3.5mm Stereo Jacks (2) |
| n/a | 9V Battery holder / contacts |
Code
The programming code for this is really basic, and is written using Arduino Programming Language. The code below is optimized to read and modify ports directly, rather than use functions to do so. While this isn’t really recommended, it shaves some precious time off each loop as the code runs. Precious time, you ask? A lightning strike on average lasts about 100ms. The shutter lag for my camera, the Canon EOS 40D is about 59ms. Add another few ms for the program to run, and there’s not that much spare time to capture a bolt in the frame. So if I can get the code from milliseconds down to microseconds, it can make a difference. The code is shown below, or download:
//beginning
#define SENSOR1_POWER_PIN 15
#define SENSOR1_APIN 2
#define SENSOR1_PIN 16
#define SENSOR1_TIP_PIN 17
#ifndef cbi
#define cbi(sfr, bit) (_SFR_BYTE(sfr) &= ~_BV(bit))
#endif
#ifndef sbi
#define sbi(sfr, bit) (_SFR_BYTE(sfr) |= _BV(bit))
#endif
int last_loop_light = 0;
int this_loop_light = 0;
int threshold = 10; // light change threshold
void setup()
{
pinMode(SENSOR1_PIN, INPUT); // set sensor pin
pinMode(SENSOR1_TIP_PIN, INPUT); // set sensor pin
pinMode(SENSOR1_POWER_PIN, OUTPUT); // pinmode for powering sensor
digitalWrite(SENSOR1_POWER_PIN, LOW); // set transistor base to LOW to switch power on
//Serial.begin(9600); // uncomment for debugging
sbi(ADCSRA,ADPS2) ; // some digital conversions
cbi(ADCSRA,ADPS1) ;
cbi(ADCSRA,ADPS0) ;
DDRD = DDRB | B10000000; // initialize digital registers
PORTD = B00000000; // initialize digital pins 0-7 low
last_loop_light = analogRead(SENSOR1_APIN); // read light level
}
void loop() {
this_loop_light = analogRead(SENSOR1_APIN); // read light level
if ((this_loop_light - last_loop_light) > threshold) // compare light levels
{
PORTD=B10000000; // set pin6/7 high (trigger camera)
delay(100); // wait 100ms
PORTD=B00000000; // set pin7 low (reset trigger)
// uncomment following for debugging:
//Serial.print("old:");
//Serial.print(last_loop_light,DEC);
//Serial.print(", new:");
//Serial.println(this_loop_light,DEC);
}
last_loop_light = this_loop_light; // set current light level
}
//end
Build
Only thing left to do now is build it! There’s a few ways of putting together a circuit board, by either positioning and wiring components on a solderless proto board, using a proto board with solder points, like I did in this case, or etch your own copper clad PCB. There are also companies that specialize in PCB creation, such as Batch PCB. However, it can take many weeks to get a board, and if it ends up being a bad design you need to start all over.
The circuit board above was designed as a Arduino “shield” or daughter card, that is placed on top of the UNO board, directly interfacing using the header pins. Alternatively, you can use the UNO board to program the microcontroller, and build a more elaborate circuit around that so everything is on a single board. Since I wanted to use my Arduino board for more things in the future, I opted for the shield design.
Stuff the completed circuit board into an enclosure (in which you’ll have to cut / drill some holes for interface ports), wire up the battery and power switch, and you’re finished! Since I wanted programming access to the Arduino board without having to open the box, I cut a hole for the USB port. The USB port on the Arduino board can also be used with external power, in case you don’t want to use the 9V battery. I also mounted the 3.5mm stereo jacks on the same side so all of my cables are on one side. Speaking of cables, that’s what needs to be made to interface with the camera. The 40D, along with many other Canon cameras use a proprietary N3 connector. I cut my Canon RS-80N3 cable release in half, and attached 3.5mm stereo jack and plug on the ends so that I can still use my remote while optionally using the N3 connector for the lightning trigger.
Lastly, assemble the light sensor per the circuit design previously shown. The phototransistor and resistors can be hard wired and soldered together, or for a cleaner look, can be mounted to a tiny PCB. This is what I did, and then protected the PCB with heat shrink tubing.
Shoot!
Time to get out and test the rig.. Perhaps in the near future I’ll write up a tutorial on night and lightning photography, but in the mean time, here’s the quick and dirty. For my initial tests, I set my camera to manual f/8 for 10 seconds at ISO 100, based on metering the night scene. As night turned to day, I changed my camera to Aperture Priority mode, still at f/8 and ISO 100. The first storm of the spring season produced the results here:
Adobe releases Photoshop CS6 Public Beta
From the press release:
Adobe Systems Incorporated today announced Adobe® Photoshop® CS6 beta, a preview of what’s to come in the next release of the industry standard in digital imaging, is available as a free download from Adobe Labs. Customers can download the beta, try out the experience and provide feedback to the product team. Packed with groundbreaking new innovations, features and incredible performance enhancements, Photoshop CS6 beta is available for the Mac OS and Microsoft® Windows® platforms. The final release is expected in the first half of 2012.
“Photoshop CS6 will be a milestone release that pushes the boundaries of imaging innovation with incredible speed and performance,” said Winston Hendrickson, vice president products, Creative Media Solutions, Adobe. “We couldn’t wait to share this beta of Photoshop CS6 with our customers and are looking forward to hearing from them and seeing the ways they are incorporating the beta into their daily creative workflows.”
Click here to download the Photoshop CS6 public beta from Adobe Labs
Finally, a major overhaul of the industry standard in image editing software! Adobe has made some huge changes in the upcoming release, some of which are outlined below:
- GUI – Completely redesigned, this version now looks more like Lightroom, with dark gray menus and background, and new icons.
- Auto and background saves – Finally, no worrying about crashing in the middle of major image work.
- Content-aware Patch and Move tools – Hugely successful Content-aware tools are now even more powerful.
- Blur Gallery – No more plugins needed for Bokeh and Tilt-Shift blurring in post!
- Color Range: skin tone and face detection – Automatically detects skin tones with a large database of ethnic variations.
- ACR 7 – In line with Lightroom 4 and Process Version 2012
- Crop tool – Redone to also more closely mimic LR4′s crop tool, with the ability to hide and not delete pixels.
- Properties panel – Expanded image properties and adjustment panels.
- Video support – Video editing within Photoshop…. not sure yet what the benefits here are, but could be useful if you don’t have Premiere.
- Oil Paint filter – A new standard filter for creating paintings from photos.
- Auto correction settings – New “Auto” in Levels and Curves focuses on Brightness and Contrast without messing with colors.
- Adaptive Wide Angle filter – Automatically fixes distortion caused by wide angle lenses or panoramic stitches.
- Type Styles – Enhanced text modifications.
- Printing UI – Completely redone printing UI for added flexibility.
For full details and screenshots, head over to DPReview.com.
March Madness Continues
A big thank you goes out to my lucky art buyers last week!
This week I’m mixing things up a bit. Instead of offering a limited set of featured fine art prints, this week’s promotion is a 20.12% discount on all artwork from AdamRomanowicz.com. Just use coupon code NKXHPJ at checkout to receive your discount off the image cost.
See something on 3scape.com that you would prefer? Contact me, and I’ll set up a similar coupon code for you personally!
More Site Updates
It’s spring time… the perfect time to launch some major site changes! This week I Blogified my news, installing WordPress on the back end, and migrating all of my news over to this format for better reading, managing, and archiving. I also plan on using it for more of a blogging platform, so I can post articles, tutorials, and other useful information that’s not site specific.
I also completely overhauled my printing back-end. I’m still using Fotomoto to handle my shopping cart, printing, and shipping for photos on this site, but am now using their handy API’s for managing images. This is transparent to all of you, but allows for much more control for me. I also have greeting card and postcard options available right from the image page, rather than having to dig through options. Try it out here:
Buy Print or Canvas | Buy Card
Lastly, I’ve uploaded a handful of new images to my FineArtAmerica managed site, some examples below:
March Madness – Week 3 – Got Art?
Holy cow! Week 3 of my own version of March Madness is here! The month is flying by, luckily there are (almost) 5 weeks in March, so I’ll have 5 straight weeks of promotions. This week’s featured limited time promotion expires at 5pm on Saturday, March 17th. Each of these beautiful museum quality 11×14 canvases is available for only $65.


Marathon Key


